


DIY Window Seat Bench & Reading Nook
- DIY with Dano

- Mar 3, 2022
- 7 min read
Updated: Mar 7, 2022
For details on my lighting hack, visit: No electricity? No problem!
I'm pretty pumped to share my recent project with you guys! And admittingly so, I was terrified for this project. Okay, maybe that's a slight over-exaggeration, but I had never built drawers before, so was a little nervous going into this project... But, I trusted my gut and my abilities and went for it!
A little back story... We recently added an addition to our home which includes a playroom and a sunroom. In the playroom, there was a dead space under the windows that was in desperate need of a little love! So, why not build a little reading nook with some well needed storage?
This might be one of my most challenging projects to date, but it was certainly the most rewarding! I'm sharing a step-by-step tutorial with all my tips, tools and mistakes with you in case you're inspired to do the same!
With that said, let's get started!

This post may contain affiliate links where we earn a small commission on your purchases at no additional cost to you.
TOOL LIST
Drill (Love our MKE Tool) Miter Saw Table Saw Brad Nailer (My most used tool and probably my favorite) Sandpaper (250 grit & 600 grit) Caulk Gun (Go for a dripless caulk gun!) Kreg Jig Kreg Jig Corner Clamp (optional but very useful) Level and square 24" Ratchet Bar Clamps Measuring Tape Purdy Foam Roller Kit (I prefer a small paint roller, especially for this project) Paint Sprayer
MATERIALS LIST
All material amounts and measurements will depend on the size of your window bench. I’ll keep my dimensions relatively general – just know you may need more or less of each material than we did.
1/2" Birch Plywood Veneer 4x8' Sheets (We used 3 sheets) 2x4's for the frame (8ft & 10ft) Drawer Slides (We used three packs of 18" ball bearing slides) 2" Torx Star Drive Screws 2" Brad Nails 5/8" Brad Nails Paint Caulk Wood Filler Paint/Stain Grade 1x2" MDF Moulding Paint/Stain Grade 1x4" MDF Moulding 3/4" Quarter Round

Step 1: Prepare the Space
As you can see in the photo above, the carpenters had put the baseboards on, so I did have to remove the baseboards to get started. I left the window trim on as I planned for my bench to butt right up to it.
(If you have any floor vents, make sure to take them into account as you will have to re-direct the airflow and leave an opening for vents.)

Step 2: Measure and Re-measure
As I do with most projects, I sat down and sketched out a plan. This helps me figure out the materials needed and helps me to avoid any oversights I could miss due to poor planning.
Determine your width, height and depth for the bench. As far as the height of the bench, 18" is standard seating height.
Next, you will need to determine how many drawers you'd like for your space. I decided on three. Below is my sketch and dimensions.

Step 3: Build the Frame
Make your frame using 2x4's. This step involved a lot of cutting and measuring (I'm not going to dive too deep into my measurements as your measurements will be different depending on your bench and drawer sizes).
As shown below, the vertical supports were attached with screws to the bottom of the horizontal 2x4. A level and square is critical when completing this project as you need to be sure every corner is 90°.

After all the vertical pieces are in place, stand the structure up and secure it to the wall and/or floor. Always try to screw into a stud for maximum support.

The front and back rows were assembled first, with equal spacing for the three drawers. Take your level and square to make sure everything is level and all corners are 90°. (This will be a recurring step for this project)

Between the drawers, I needed something to attach my drawer glides to, so next up was building support blocks using 2x4's. This part was relatively easy... Measure, cut, install.

You'll also notice I added some additional vertical support blocks — this is because I needed something for the top 2x4 to rest on.

Next, it was a matter of cutting and attaching the remaining 2x4's and blocks for support. I used my Kreg Jig which worked like a charm for all my butt joints. I also used a clamp to hold them in place as the boards needed to be perfectly level. Additional support blocks on the top are a good idea as it will help support the top and any additional weight.

Here's what the final framed structure looked like.

Step 4: Moulding
Now it's time to attach the trim pieces and the plywood top to the frame. The moulding is added to help give it a more polished look while covering the unsightly 2x4's.
For the top, I used 1/2" Birch Plywood Veneer: 4ft x 8ft sheet cut to size.
For the horizontal trim pieces, I used 8ft 1x4"white MDF moulding.
For the vertical trim pieces, I used 8ft 1x2" white MDF moulding.
(Make sure you take into account the "actual size" when selecting your moulding)

I used my Ryobi Brad Nailer again here to attach the horizontal moulding.

... and my Ryobi Brad Nailer yet again to attach the vertical moulding. And, it's starting to look like a bench!

Step 5: Build the Drawers
The first step to a successful drawer install is a successful drawer build. Or so I read ;) Read the directions on your drawer slides for the spacing required, however, most ball bearing slides that I have used require 1/2" spacing on each side of the drawer. So, I built my drawers 1" smaller than the cabinet opening which for me was 28 3/4". Make sure to double check your measurements as it's very normal to be off a bit after your frame is built.
For the drawer and the top of the bench, I used the same 1/2" birch veneer plywood.
Using a miter saw, cut your boards to size. Place painter's take over the cut lines which will keep the plywood from splintering. (🚨Mistake alert: I didn't do this on the first couple of cuts and sure enough, the wood splintered)
Next, you will want to use the Kreg Jig again to add pocket holes. Due to the size of my drawer, I did 3 pocket holes on each side.

Next, I used my Kreg Jig Corner Clamp (which is a bit pricey but SO worth it) to help hold the two butt joint boards in place while inserting the driving pocket screws. I used 5/8" pocket screws for this project. (Here's a cheaper version of the Kreg Jig Corner Clamp I found on Amazon — I can't verify the quality though as I've never used it: DEVMO Corner Clamp)

Once all four corners are assembled, check that the assembly is square.
Next, it's time to add the drawer bottom. This should fit nice and snug.

To secure the board in place, take your Ryobi Brad Nailer and nail the bottom piece to the drawer.

Congratulations, your drawer is done! Check once again to make sure all corners are 90°.
Step 6: Drawer Slides
Next up is the drawer slides. While there are tons of drawer slides to choose from, I gravitated towards these 18"heavy duty full-extension ball bearing slides.
Regardless of the type and style of your drawer slide, you will want to install the cabinet member first. (see diagram below). Separate the cabinet member from the drawer member.

Now you'll need to determine the placement of your drawers. Use a pencil and a straightedge — draw a level line across the cabinet or wall to mark where you'd like to attach the cabinet member. The key here is to make sure the slides are perfectly level. I stacked some scrap 2x4's to make sure the slides didn't shift when screwing them in. Verify that your slides are level and even on both sides before completing installation.
Next, came the drawer member slide attachment. These need to match up to the cabinet member. The first drawer take some time and required me to take a couple deep breaths.
I honestly thought this part would be a mess, but was pleasantly surprised with how it all came together. The final two drawers came together much smoother!

If your drawer is not sliding as you'd like, you can always make small adjustments.
Step 7: Drawer Face
Next up was making the drawer face. A drawer face is used to clean up the front of the cabinet and fully enclose the interior. Doing an extended drawer face overlaps the cabinet face which helps hide any small imperfections or misalignments. (Which was a must for my first drawer project!) This part is not essential, but will certainly give your cabinet a more "finished" look.
The drawer fronts were made using the same 1/2" smooth birch plywood veneer. Cut the drawer face to the desired size.
Next, position the drawer face over the drawer box. I placed a 2x4" on the ground to serve as a spacer to make sure all drawers were even.
With the help of my Ratchet Bar Clamp, I used the Ryobi Brad Nailer to adhere the drawer face to the drawer. Make sure to take into account the size of your finishing nails and depth of your drawer + drawer front.

I finished off with some light sanding using 220 grit (fine) sandpaper.

Step 8: Drawer Face Frame
With the hardest part out of the way, I focused on making my face frame using 1x4" MDF Molding.

I used my Milwaukee Tool Miter saw to cut 45° angles and my Ryobi Brad Nailer to attach the moulding. Is it obvious yet that my favorite tool is the brad nailer?!

This step involved lots of measuring and cuts. I did my best to get these miters as tight as possible. They aren't perfect, but that's what wood filler is for!

Step 9: Finishing Touches
Now, you’re ready to begin the most satisfying part of the process – making it pretty. Caulk and wood filler are MAGICAL! In all seriousness, they can easily turn something amateur-looking into something professional.
Use wood filler to fill all of the nail holes and outer corners of your trim and moulding. Wood filler dries hard, and can be sanded and painted to blend in. Fill holes, sand flush, fill holes, and sand again! Use caulk to seal the gaps, seams and inner corners. Caulk is available in both silicone and acrylic. (Note: Silicone can't be painted). Also, keep in mind that caulk can't be sanded so should be applied neatly.
For sanding, I started with 220 grit (fine) sandpaper and went up to 600 grit (super fine). Here's two helpful charts from Grainger on sand paper grits and what they should be used for.


Step 10: Finishing Trim
This step isn't necessary, however, in our Master bedroom we have a bench that has quarter round on the top. I liked the finished look of it, so decided to match it!

Step 11: Hardware
I prefer to drill the holes for my hardware prior to painting in case I make any mistakes. My cabinet pulls are from Restoration Hardware.

Step 12: Time for Paint!
Wipe everything down with tack rags to clean off all surfaces that will be painted or stained. After wiping everything down with a tack cloth, the surface will be entirely smooth and dust-free.
Tape off everything before painting. For super smooth coverage, try the FoamPRO Fine Finisher Roller. It creates a smooth, lint-free finish and works great with paints, urethanes, varnishes, primers and stains.
I painted everything using Sherwin Williams Eider White which matches the trim in our house.
I used the foam roller on the bench and sprayed the drawers using my HomeRight Paint sprayer.

Here's how it turned out! I'm SO DAMN happy! We installed some simple sconces (no wiring involved) for reading which I'll be sure to make a blog post on soon!
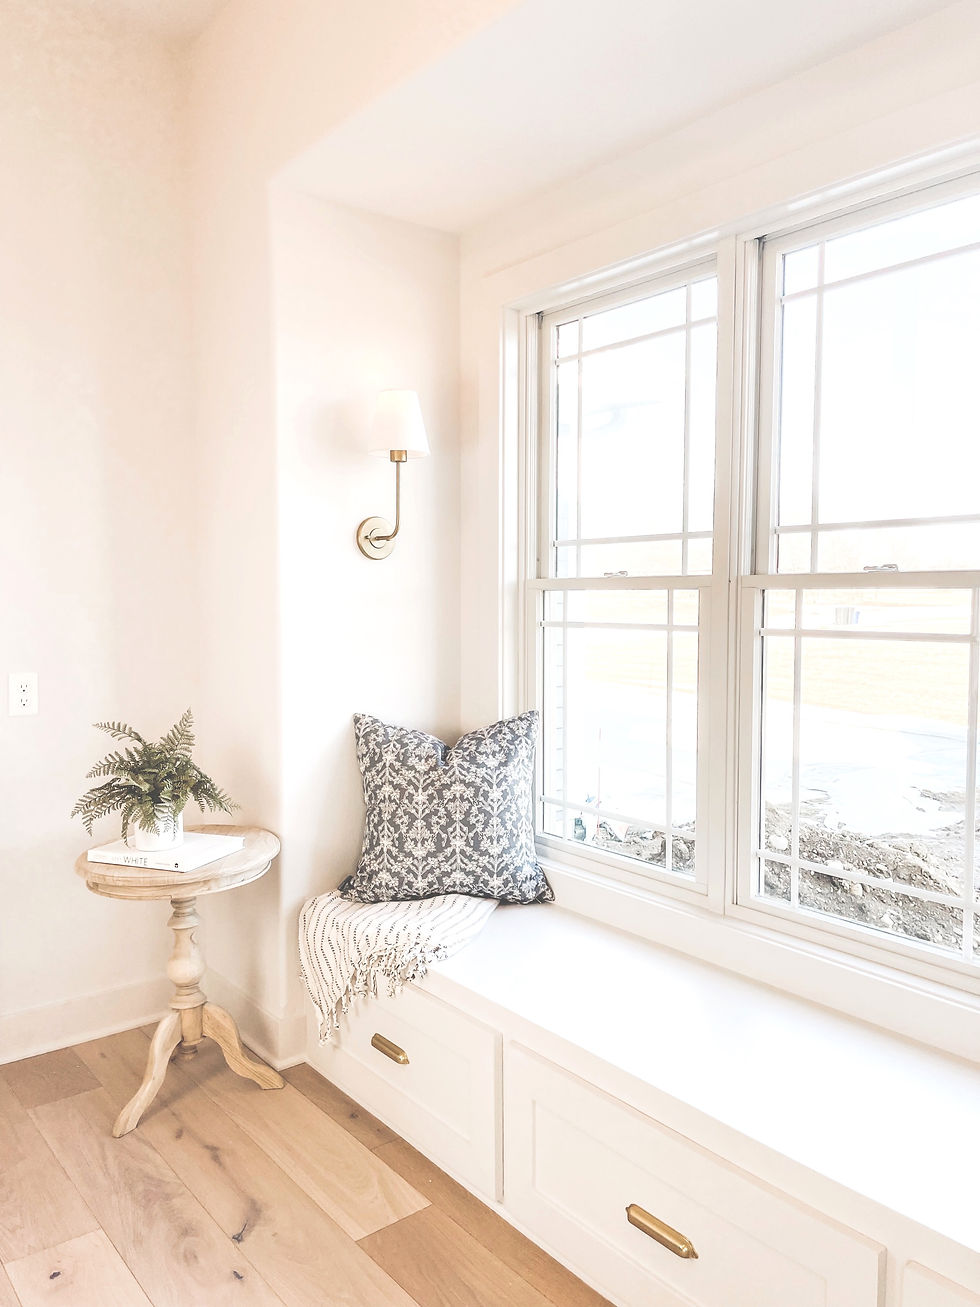
Even though our bench overlooks a porta potty and dumpster currently, I'm so happy with how it turned out. Let me know your thoughts or if you have any questions!


Comments